How to Make Personalized Resin Coasters at Home
Creating personalized resin coasters at home is a delightful and rewarding craft project that allows you to express your creativity while crafting functional art pieces.
Understanding the Basics of Resin Crafting
Resin crafting has gained significant popularity in the DIY community, offering endless possibilities for creating unique and personalized items. Resin, a synthetic polymer, is known for its versatility and durability. It’s available in two main types: epoxy and polyester. For beginners, epoxy resin is often recommended due to its ease of use and lower toxicity. When mixed with a hardener, resin transforms from a liquid to a solid state, allowing you to encapsulate objects or create smooth, glossy surfaces. Before diving into the project, it’s essential to understand the safety precautions. Wearing gloves, working in a well-ventilated area, and using a mask can protect you from fumes and skin irritation. Additionally, having all the necessary tools and materials, such as mixing cups, stir sticks, and molds, ensures a smooth crafting process. Understanding these basics sets the foundation for successful resin crafting.
Choosing and Preparing Your Materials
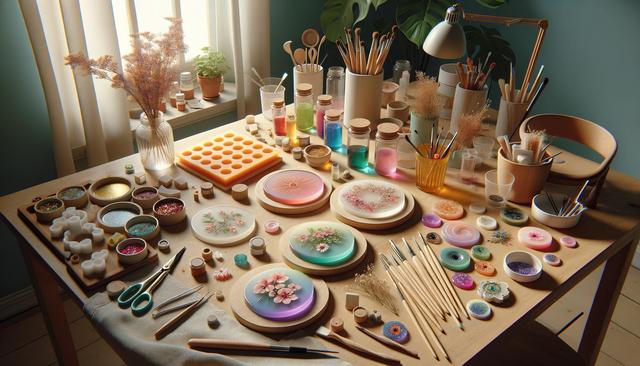
The success of your personalized resin coasters largely depends on the materials you choose and how well you prepare them. Start by selecting a silicone mold in the shape and size you prefer for your coasters. Silicone molds are flexible and non-stick, making it easier to remove the finished product. Next, gather the decorative elements you wish to embed. These could include dried flowers, glitter, small photos, or other tiny embellishments. Consider the overall design you want to achieve and how these elements will complement each other. Before pouring the resin, ensure that your mold and embellishments are clean and dry. Any moisture can interfere with the curing process and affect the clarity of the resin. Proper preparation of your materials ensures that your resin coasters turn out as envisioned.
Mixing and Pouring the Resin
Mixing and pouring the resin is a crucial step in creating your personalized coasters. Begin by measuring equal parts of resin and hardener according to the instructions provided by the manufacturer. Accurate measurements are vital to ensure a proper cure. Stir the mixture slowly and thoroughly, scraping the sides and bottom of your mixing cup to ensure a uniform blend. Avoid stirring too vigorously to minimize the introduction of air bubbles. Once mixed, you can add colorants or pigments to the resin to achieve your desired shade. Pour the resin slowly into the mold, allowing it to settle and spread. Use a toothpick or heat gun to pop any surface bubbles, ensuring a smooth finish. Patience during this step contributes significantly to the final quality of your coasters.
Adding Personal Touches
Personalizing your resin coasters is where creativity truly shines. Once the initial layer of resin has been poured, it’s time to add your chosen embellishments. Carefully place each item onto the resin surface, arranging them according to your design plan. If you’re embedding photos or paper elements, consider sealing them with a waterproof sealant first to prevent discoloration. After placing your items, pour another layer of resin over them to encapsulate and secure everything in place. Gently adjust the position of the embellishments with a toothpick if necessary. This step is your opportunity to make each coaster unique, reflecting personal tastes and memories. The care you take in adding these personal touches will be evident in the final product.
Finishing and Curing Your Coasters
After adding your personal touches, the final step is to allow the resin to cure completely. Curing times can vary based on temperature and humidity, but it generally takes 24 to 48 hours. Cover your coasters with a dust cover to prevent debris from settling on the surface as they cure. Once the resin has hardened, carefully remove the coasters from the mold. If you notice any rough edges, you can sand them down with fine-grit sandpaper for a smooth finish. Optionally, you can apply a coat of resin gloss sealer to enhance the shine and protect the surface. The curing and finishing process requires patience, but it ultimately ensures your coasters are durable and ready for use.
Conclusion
Crafting personalized resin coasters at home is not only a creative endeavor but also a rewarding one. Through understanding the basics, carefully selecting and preparing materials, and adding personal touches, you create coasters that are both functional and aesthetically pleasing. This project offers an excellent opportunity to explore your artistic side and produce something unique to your home. With practice and patience, you can refine your skills and expand into more complex resin projects. Whether for personal use or as thoughtful gifts, these coasters serve as a testament to your creativity and craftsmanship.

